Sneak peak at summer 2013 art lessons!

I am already getting some ideas for next summer.  :-)  I'm pretty super excited about this one so I'm going to give you some hints.
Here's my inspiration:
First, this song:

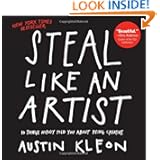
Then I discovered this book (picture links to Amazon):
Product Details
Oddly the day I was researching for my theme I've been mulling over in my head for some time there was a huge museum break-in !  Yikes!  I have no alibi.  I was at home; alone; looking up stolen art on Wikipedia.  My husband enjoys teasing me about that one.  It wasn't me, I wasn't doing that kind of research!   ;-) There was another museum heist on Sunday. Crazy. 
I would like to do movies again so if this is sparking your imagination like it is mine, please feel free to get a head start. Same rules as last time:  5 minutes or less, family friendly, must have the theme somehow somewhere included in the movie if even only for a brief moment. This time:
 Art stolen, escaped, or rescued.

This is going to be so much fun!  I'm so super excited :-)

Traveling Through Time by Bicycle- 2000's (today) Steampunk inspired Artist Trading Cards


For the "today" of our time travel journey I chose to do Steampunk and artist trading cards since ATC's are a fairly recent trend.  Steampunk just seems to be the logical choice for a week of time travel, don't you think?  Steampunk is kind of a science fiction history mix; basically taking something modern or from "today" and making it look like it came from the steam engine era.  It's also a literary movement influenced by the works of H.G. Wells.  Artist Trading Cards are baseball card size pieces of art that you can trade with friends.
We put the two together and for the first card we had to draw an invention for a time machine.  Then we drew whatever we wanted on other ones.  I had the students stick to drawing supplies- markers, colored pencils, pastels, charcoal pencils.
You can buy trading card size paper or you can cut  your paper into 21/2" X 31/2".  It's a great way to use scraps of paper you might have (since art paper is not sold the same size as common photo picture frames you might have some occasional trimmings).
You can buy the pocket pages anywhere baseball cards or Pokemon cards or anywhere collector cards are sold.  I found mine at Target in the same section as the cards and puzzles.   This was fun and some kids made enough to fill a whole pocket page.  Sadly, not a whole page of inventions; I loved seeing their ideas for inventions and time machines.
Don't forget you can trade them with your friends!  :-)


Traveling Through Time by Bicycle- 20th Century (1900's) Absract Minimalism


Of course a poster again with a few of my favorite minimalist style art pieces. :-)  This time featuring the artists: David Smith (sculptor), Franz Kline, Ellsworth Kelly, Kenneth Noland, Kasimir Malevich, Matisse, and Kandinsky.  Did you notice Matisse and Kandinsky were also part of the last post?  I think it's great to see how their style changed over the years, becoming more simplified and stylized.
"Modern" art is sometimes difficult for some people to understand- "it doesn't look real" or "I know a 3 year old who could make that" are common statements.  What do you think about it?
Once you have learned to paint something realistically what else is left?  You cannot make it real with paint.  Have you hit a wall?  What can you do?  Sometimes when you have moved forward to an ideal you have to go backwards, start over, and then maybe there is something there you never noticed before. 
Once the camera was invented there really wasn't a need for art to be real.  Artists began exploring what actually made art "art"and what possibilities lay ahead for the future of art.  Just like science during the 20th century was making leaps and bounds so did art.  Art is a reflection of the thinking during a time period. When the world was fascinated with time and space and physics artists were exploring similar ideas or theories and how they might apply visually through art styles like (Marcel Duchamp- Nude descending a Staircase No. 2)  Some artists explored what sound might "look" like (Kandinsky).  When you listen to music with your eyes closed, do you imagine something "real" or shapes or colors or wiggling lines?  When psychology was a popular fascination and breaking through as a science artists explored what that meant for art too- What is in my dreams or the things I don't think about but are somewhere floating in my brain, maybe I can paint that too (think Salvador Dali).  Some artists watched kids paint and thought, "hey that 3 year old's painting is pretty good!  I wish I could still paint like that and wasn't so concerned about the "rules" or what people say art has to be, maybe I will paint like that again."  So many questions and SO many possibilities!

To go from this:


 to this:
 and then to this:

 is actually quite a developmental and intellectual process and can be challenging for some so we took it step by step.  For an artist to draw something realistic it is part of the process to look at something and visually break it down into shapes.  First you need to sketch the very basic shapes and then you would add lines and details.  What if we leave it in this "raw" state instead of adding details and shading?  It looks kind of interesting.  What if we rearrange those shapes?  What if we take some out?  Can it still be called what it originally looked like?  Why or why not? 


Supplies:
Paper
scissors
glue
paper in basic bright colors cut into shapes

This one took a lot of prep on my part.  I had to first break a bicycle down into basic shapes then cut those shapes out of paper and then cut enough for all the students and write down how many of each shape each child would get.

Now that we've done that everyone gets a piece of paper and their allotted number of shapes.
Everyone look at a bicycle- what basic geometric shapes (circle, rectangle, triangle) do you see?  Now using your shapes arrange them into a bicycle.

Now rearrange those shapes any way you'd like on your paper.

Once you get it the way you like it glue it down.

Here's some of the final results (some kids wanted to add more shapes so as long as they stuck with basic colors and shapes I let them):


Traveling Through Time by Bicycle- Early 1900's (Fauvism and the Blau Reiter Group)


Speedily moving through history on the third set of lessons we learned about the Fauv group of French painters and the German group of friends known as the Blau Reiter or Blue Rider group.  These painters, while not necessarily associated with each other, during this style of painting used very vibrant and expressive colors.  The movement didn't last long, but is clearly (in my opinion) the natural transition from traditional painting to abstract.  At the time it was considered horrific- the colors were shocking, and to paint something not it's natural color?; a horrid disrespect to the human body, God, and nature.  For us, it's just fun.  We see colors like this around us all the time now. :-) 
I also had the students look around- what colors do you see in something?  This bush might look green, but what about in the shadow?  Is it a little bit blue or purple? A fauv painter would paint it blue or purple.  The sunny part that looks more yellow green? It would get painted yellow or yellow green.  What turned out to be the perfect example I wasn't planning on was my red van in the driveway.  The sky was reflecting in the hood so it actually looked purple with pink clouds if you looked at it instead of letting your brain tell you it's red.  This is a very abstract concept and very hard for some personalities to see so I didn't push the issue but did want to make sure I pointed it out.  Some kids laughed at me and said it's red.  That's okay.
For our paintings I asked the class to paint a bicycle, or something they might see or scenery they might see while riding a bike.  I also gave them the rule of only using colors- no black or brown.  If they wanted black or brown they'd have to come up with a different color.  I also tried hard to get the kids to fill up the entire page, but that's easier said than done for some kids.
If you like this style here's some artists to look into:  Andre Derain, Henri Matisse, Maurice de Vlaminck, Wassily Kandinsky, Franz Marc, August Macke, Jawlensky, and Gabrielle Munter.

Supplies:
paint brushes
tempera paint (I'm a huge fan of Blick's colors- but they are not all washable from all fabrics)
paper (I used yellow bulletin board type paper so we would start off bright and so I could cut large pieces)
water for rinsing brushes
paper towels for cleaning up spills

Paint away!  Here's some of my favorites:


Traveling Through Time by Bicycle -1400-1800's (Printmaking)


Printmaking!  I love this one. :-)  Okay, I love lots of them.  This one was a big surprise for students though, which makes it really fun- discovering a whole new world they never knew existed.  I did not get a lot of people to sign up for this one the first session, but once they saw what it was they signed up for it the next session.
For younger kids we did stamping with different items dipped in paint, but ages 6+ I let carve a rubber block and print with it.
I had a poster I made again with different printmaking styles and famous print makers:  Rembrandt, Albrecht Durer, Hokusai, Hiroshige, Gustave Dore, and of course Gutenberg and his press that changed the world- with printing more people could learn to read. 

Supplies:

From Blick I purchased:
the large 4 1/2" bamboo baren (but you can also use the back of a spoon)
a 4" hard rubber roller (item #40101-1004
Lino cutter set (item #40216-1001)
Blick water soluble printing ink in black 5oz tube
E-Z-Cut printing blocks, box of 2 4"X6"
 
Paper (I have large pad of smooth watercolor paper that I cut into 4X6" rectangles, but any heavy weight paper should work; try some newsprint too- experiment with different types of paper to see the different results.)
plexi-glass

Directions:
Step 1:  Decide what you want your print to look like.  Make some sketches.
Step 2:  Pencil draw it on your block.  *REMEMBER! IT WILL PRINT OPPOSITE OR BACKWARDS OF WHAT YOU DRAW* (I got really super excited when I got my nice package of supplies and started carving away and when I was finished I remembered I needed to carve it backwards or "mirror image" ;-P -don't make my mistake)
Step 3:  Use the cutting tools to carve your block

Step 4:  Brush off your block so it is clean
Step 5:  Put a dab (like a tablespoon or so) of ink on the plexi-glass
Step 6:  Roll the ink with the roller so it covers the roller fairly evenly

Step 7:  Use the roller to cover your whole block evenly with ink

Step 8:  Place your paper on the block

Step 9:  With even pressure use the baren to rub over your paper

Step 10:  Carefully lift your paper off the block
Step 11:  If you'd like to print a second lighter one repeat steps 8-10.
Step 12:  Rinse off your block, wash your hands, and pat your block dry with a paper towel.

If you'd like to make more repeat steps 7-10 :-)


This is an amazing tactile experience for kids, I just love it.  The carving, the stickiness of the ink, the rolling it- it's a serious but very enjoyable process.
Some things to note:  I got all supplies I used from Dick Blick except the paper and the plexi-glass.  I checked the internet for some local glass and/or plexi-glass suppliers.  I found a local place (A-1 Acrylics incorporated) that sells scraps for $1 a lb. (I bought 3 pieces totalling 3lbs. and $3).
The rubber blocks we used were thick enough to carve both sides and have two printing blocks IF the students were careful not to carve too deep.  Also if carved to deep they break easily.  I let kids use one block we shared to practice on so they knew what it felt like to carve with the tools before starting their own.  It isn't as hard as it looks.
We did this in my garage in the summer and in the first class I noticed as the day wore on the ink would start to melt and thin in the heat and humidity.  The next time I did it I kept the ink in the air conditioned house when not using it and that helped it keep it's tackiness.  You want the ink to have a nice balance between tacky and smooth so the ink rolls onto your block better.  You'll be able to tell a difference and find that balance once you've rolled the ink and made a few prints.  I purchased one 5oz. tube and it lasted for all my classes (about 30 kids) making a handful of prints each and I still have some ink leftover.  The ink I bought is washable and seems to have washed off the supplies well with water and out of the aprons we wore, but I still recommend wearing an apron and not your best outfit.
Also remember to wipe your block clean between inking it- if you let dried ink build up on your block you will have bumps in your print.
I also noticed on Blick's website they have videos about printmaking if you are interested (see the link in supplies).


Traveling Through Time by Bicycle- the beginning up to 1000 AD


For this lesson we focused on pottery and made pinch pots.  I first asked the kids a few questions like:
Why make pottery?
What do you think people living in ancient history would put inside their pots?
What would you keep in a pot?
I let them answer whatever they wanted- the questions are kind of open ended and I use them mostly to get the kids thinking about it more than a factual right or wrong answer.
I had a poster with pictures of pottery from a few different places around the world.  We talked about what they had in common and what was different.  I also wanted to emphasize the decorations on the pots were of things they would see around them- Egypt had hippos for example, and Mycenaean had dolphins and octopus.

Since we are traveling through time by bicycle in this set of lessons and bicycles are something we see today I asked the students to somehow work a bike into their decorations on their pots.  (I also said they could create a bike they thought would be possible in that time period if they wanted- my son talked about making clay wheels and stick frame for a bike, but he didn't do it.)

To make our pots we started with Amaco Mexican Pottery Clay purchased from Dick Blick.  It is a nice red clay that was very good to work with.  One 25lb. box was enough for roughly 40-50 small pots.  I used fishing line tied to a fishing bobber at each end (I found the round shape to be more comfortable than a block of wood, but not like that is a big deal, it's just what I had ready and available) to slice the clay - you wrap the the fishing line around the clay, cross it over and pull, and it gives a nice cut.  I then divided each (roughly 1" or 2) slice into four and gave each student a section.
Next we squished our clay into a ball and made it nice and round.
Then holding the ball in one hand, press the thumb of your other hand into the clay ball.  Now press the sides of the ball between your thumb and fingers as you turn the ball with the hand holding it.  Once you have a basic pot shape you can work it to your desired shape.
If the clay starts to crack a little you will want to get your fingers wet with a little clay and water on them to make a little bit of clay slime called "slip" and use this to smooth the cracks in your pot.
Once we had our pots to our desired shape and smooth we used toothpicks to draw designs or add textures.  I also had black and white paint if anyone wanted to paint on there pot.  We painted on our pots during the same class while the clay was still damp.
Just a note:  Once your pot dries you will want to remember that since it is air dry clay it will not hold liquids.